Girl Scout Cookie Clone: Tagalongs
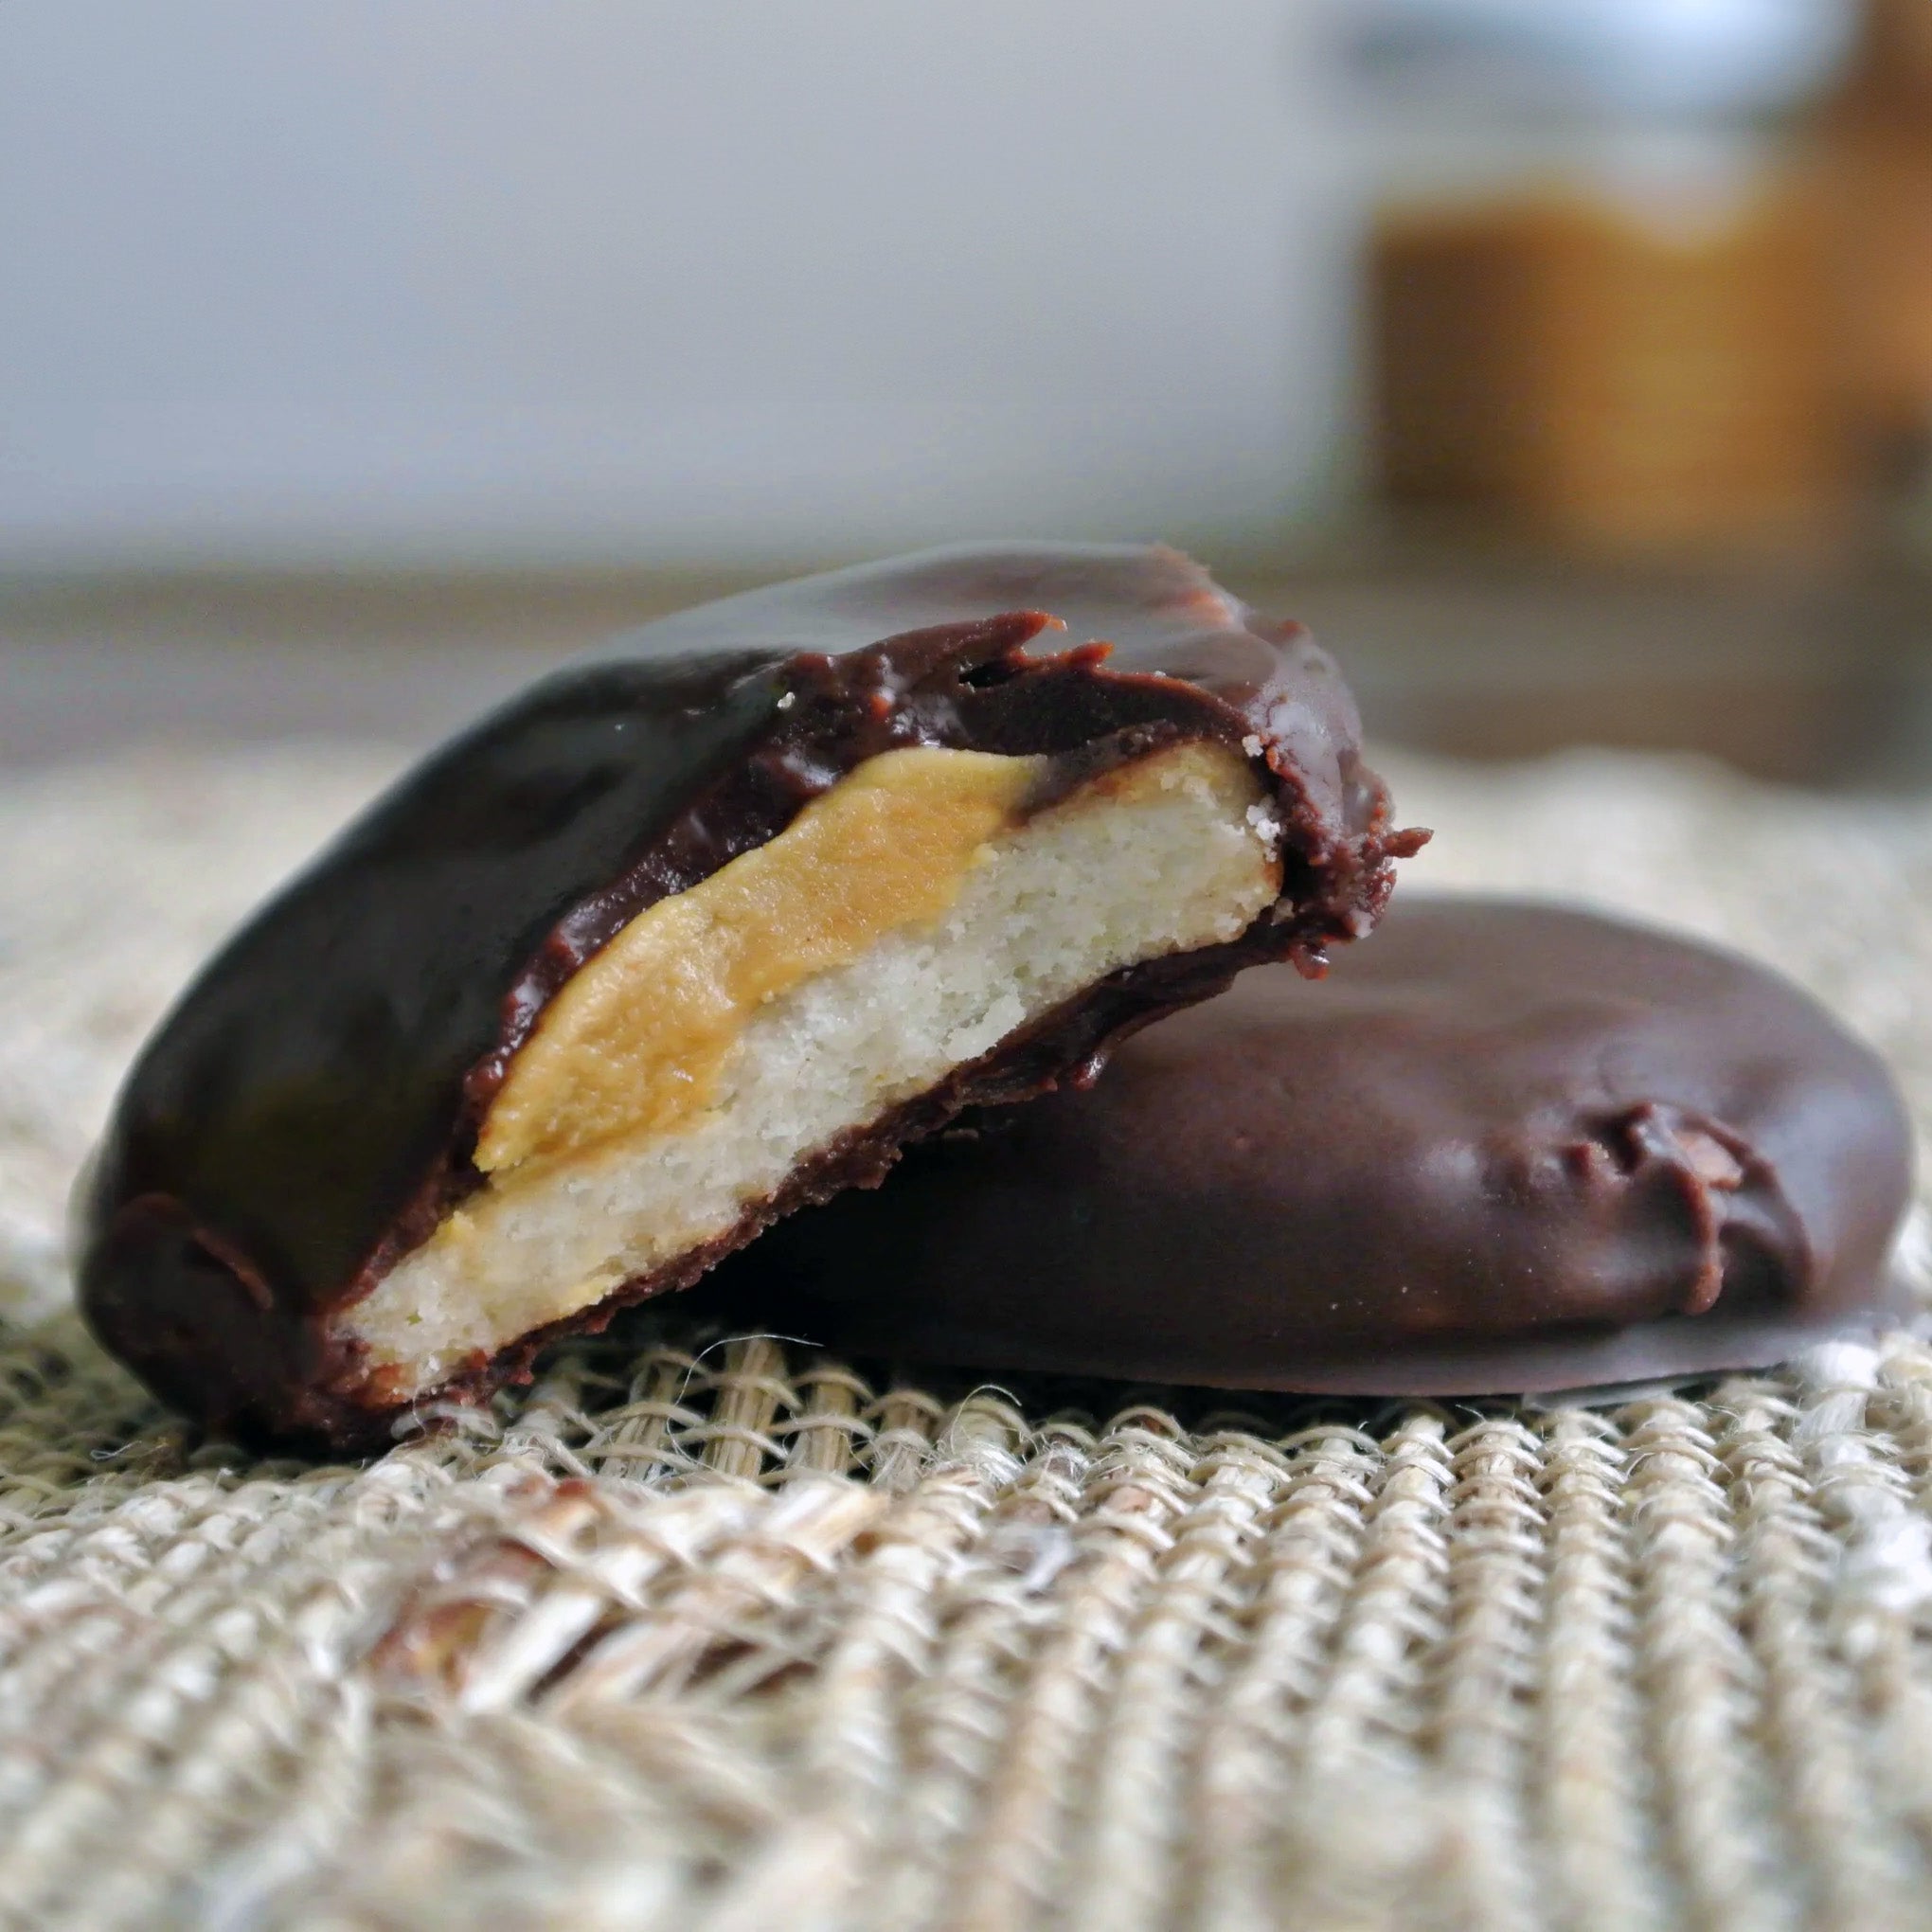
The third most popular Girl Scout cookie is the Tagalong (also called Peanut Butter Patties). Naturally, with gluten, dairy, and peanut allergies in our house, if I ever want to eat these, I have to make them myself. After a lot of research and experimentation, I think I’ve cracked the Tagalong clone and have created a really yummy, allergen and corn free vegan version. With my Girl Scout Shortbread Base and sunflower seed butter (you could use soynutbutter or peanut butter instead if you are not allergic), you will be able to make a great ‘clone’ of this delightful little cookie.
Girl Scout Cookie Clone: Tagalongs
Serves: Makes approx. 3 boxes
Ingredients
- 1 recipe prepared Girl Scout Shortbread Base
- 1 1/2 c smooth sunflower seed butter (you may use soynut butter or peanut butter if you wish)
- 3/4 c powdered sugar (regular or corn free)
- 1/8 tsp salt
- 1/2 tsp vanilla extract
- 10oz semi sweet chocolate chips (we recommend Enjoy Life allergy free)
- 1-4 tbsp dairy free margarine (we recommend Earth Balance soy free, you may also use butter)
Instructions
Preheat oven to 350 degrees F.
Prepare Girls Scout Cookie Dough. Divide into three equal portions. On a lightly floured surface, roll the dough out to about 1/4 inch thick. Using a 2 inch cutter, cut the dough into circles. Repeat with remaining portions of dough.
Weigh. For best results, each circle should weigh between 10 and 12 g, so you should get three sets of 111 or 12 cookies, for a total of 44 cookies.
Place the cookies on parchment paper covered cookie sheets (you may also just use non stick cookie sheets). Bake for about 8-12 minutes, or until barely golden brown.
Remove from the oven and allow to cool on a wire rack completely before proceeding with the next step.
Prepare Filling
In a bowl, beat together sunflower seed (or soy nut or peanut) butter, powdered sugar, salt, and vanilla extract. The mixture should start out crumbly but should become cohesive as it is beaten. The texture should be smooth, and only slightly sticky – about the texture of Play Doh or fondant, and you should be able to break off small balls of it and roll it easily in your hands. You want it slightly tacky, so that it adheres to the cookie, but solid enough that it will not melt into the prepared chocolate when you dip the cookie.
Prepare Chocolate
Melt. In a double boiler (or a bowl set in a pan of water) over low heat, melt the chocolate, stirring constantly, until smooth and flowing. Depending on the type of chocolate you use (particularly with dairy free chocolate), you may need to add a little bit of dairy free margarine (or butter) to the melted chips – you want the chocolate to flow easily when warmed to about 89 degrees, but still able to set when at room temperature.
Test the chocolate by raising the whisk out of the pan. The chocolate should cling to the tines, but extra chocolate should easily drop/drip off of the surface. If your chocolate seems thick and does not flow off of your whisk when raised from the surface, slowly whisk in the dairy free margarine until it is easy to stir the mixture. It should be the consistency of heavy cream. Keep warm.
Assemble Cookies
Measure 1/2 tsp of filling for each cookie. Roll the filling into a small ball and place on the cookie – the filling should be slightly tacky and should adhere rather easily when pressed to the surface of the cookie. Gently flatten the ball to cover most of the top surface of the cookie. Repeat with remaining cookies.
Coat. When all cookies are assembled, begin to coat the cookies in chocolate. To do this we have found it is best to hold the cookie by the edge and rotate it through the chocolate until all surfaces are covered. You may also use a fork and plunge the cookie (cookie side down) into the chocolate. Set onto waxed paper to cool.
Cooling. Allow to cool completely before placing in a container. You may speed this up by using a fridge or freezer to help set the chocolate.